Getting Your project set up with Version Control in RStudio
Overview
Time: 30 minObjectives
Copy an existing project on Github to make contributions
Open a project with Git versioning in RStudio
Learn the basics of Git - pull, add, commit, push
Make our first edits in a verison controlled project
Using R projects and Version Control in RStudio
It’s a two step process to work on a project in RStudio with version control. First step is to make sure your work is set up as an R Project. Secondly, and optionally, when you set up your project you can have the option to add versioning (or continue from an existing version-controlled project).
Starting an R Project
There are several options for working with R projects in RStudio. If you aren’t already working in an R Project, you can create a new one. There are three options here:
- New Directory - start a brand new R project.
- Existing Directory - add exisiting work to a R project.
- Version Control Continue an existing R project that already uses version control (i.e. download from GitHub).
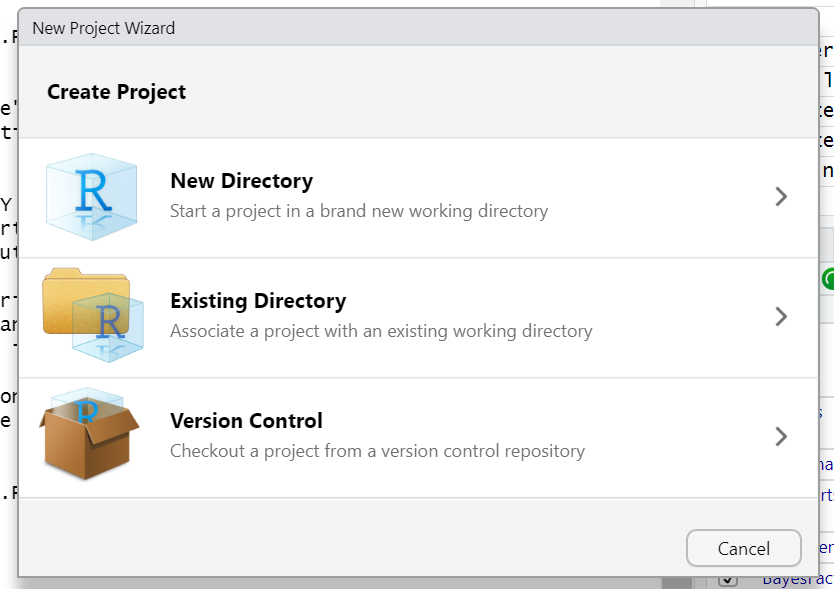
The third option would be a project already under version control but options 1 and 2 will also give you the opportunity to use or add versioning to the project. Let’s see how that would work.
Starting a R Project with Version Control
To start an R project, you would navigate to File > new project rather than just File > new file.

After choosing New Directory chose new project on the next menu options.
Then, to use version control, make sure to check the “Create a git repository” box as highlighted in this screen shot:
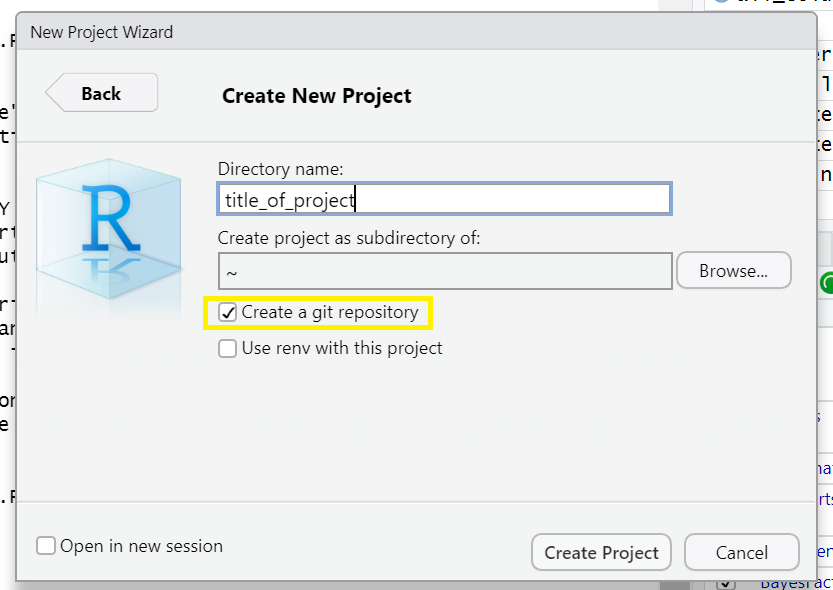
*Note when you choose directory name, it will create a new directory in the directory you specified along with an .Rproj file of the same name. Avoid spaces here. underscores “_”, dashes “-“ or camel case “NewProject” is the recommended way to name this directory/file.
*Optionally, check the box in the bottom left corner “Open in new session” if you want it to appear in a new RStudio window.
Add versioning to an existing project

We won’t take the time to cover this here, but if you’ve already started an R project WITHOUT version control, you have the option to add version control retrospectively. You can also add existing R files to a project and version control if you’ve done neither. To see a tutorial of this process, please see episode 14 “Using Git from RStudio” in Version Control with Git.
This is by far the most labor intensive way to do it, so remember to add version control at the beginning of any new project (even if you get lazy and don’t end up using it).
Continue a version-controlled project
 The final option is to continue a version controlled project. This is the option we will do for our workshop.
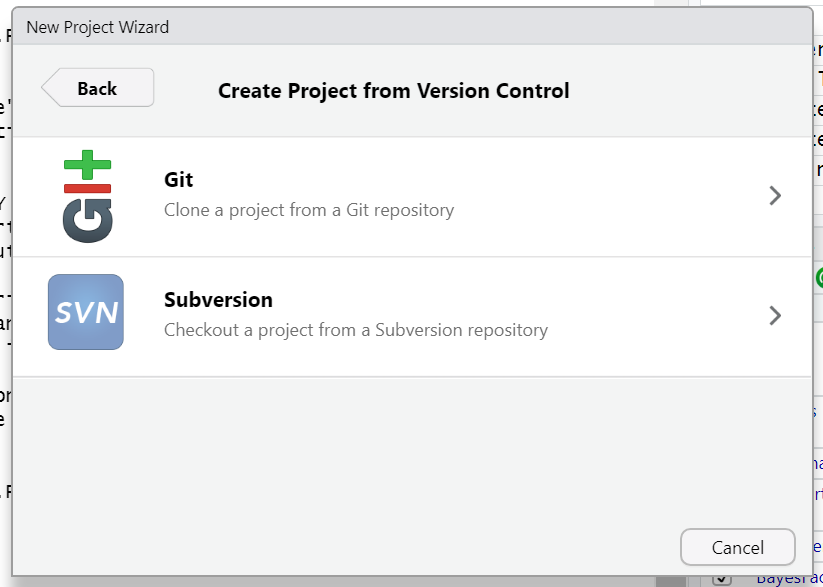
First, indicate which version control language you will be using (Subversion is another less popular language than Git)
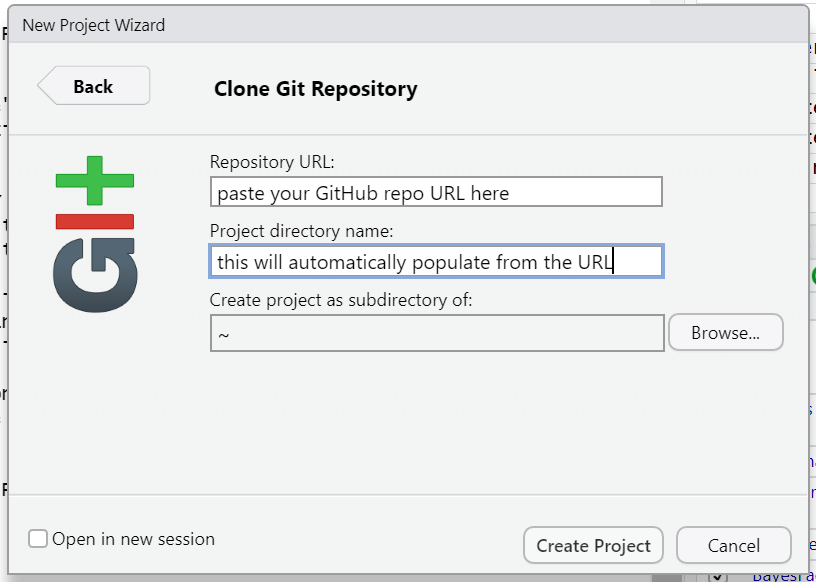
When you choose this option there will be a place to paste the url of the GitHub (or other hosting platform) url. The name of the repository will automatically populate. Just choose which directory on your computer you wish to save the project directory and your good to go!
Our turn!
We have a repository already prepared for this workshop at https://github.com/UCSBCarpentry/R-repro-pub We are going to use the third option to download a repository from GitHub to work hands on.
Let’s take a second to acquaint ourselves with GitHub. At this link, you may sign into your GitHub account or create one if you have not already.
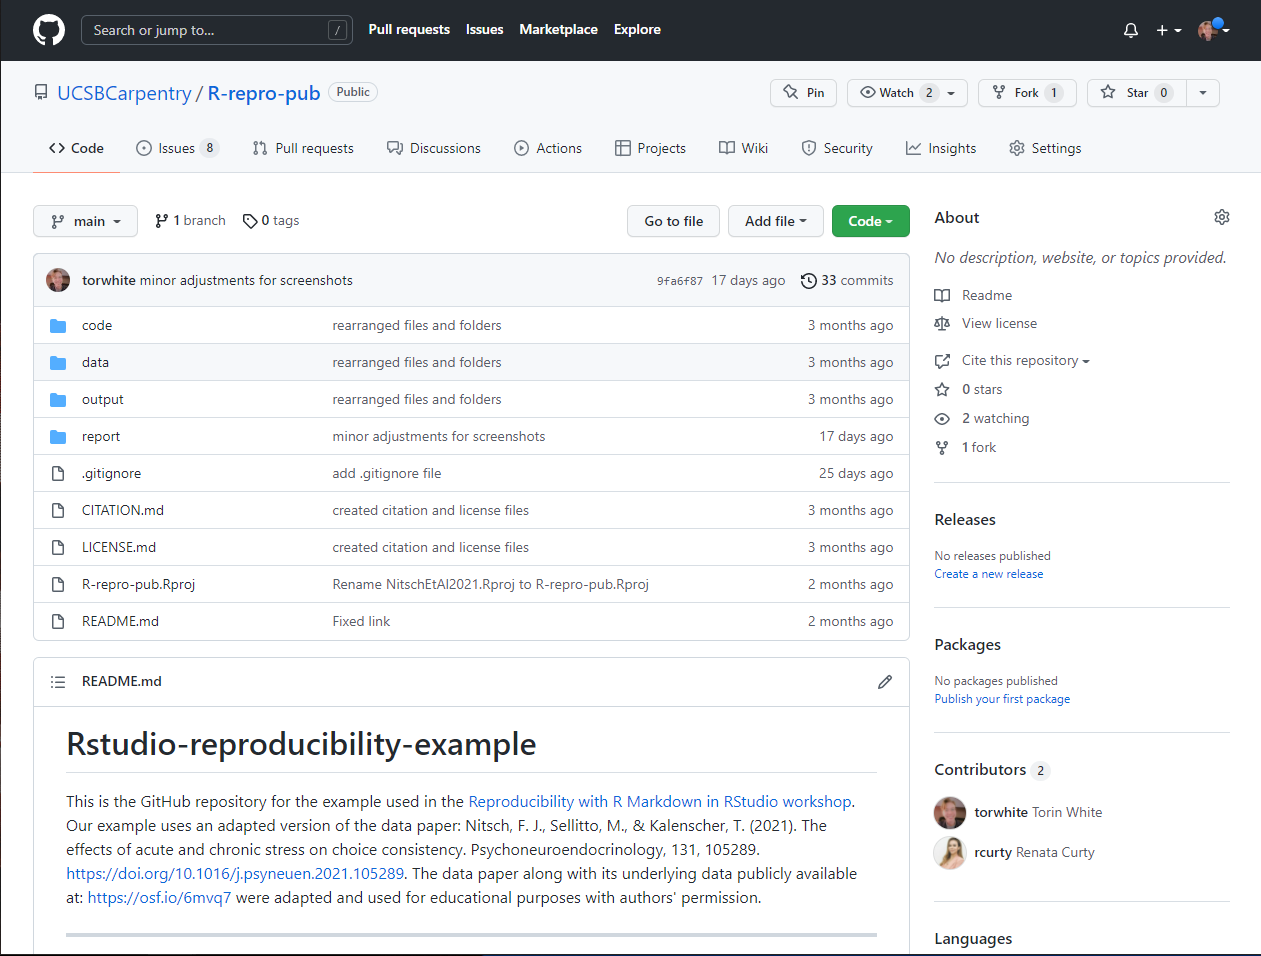
The two main sections are files and directories and the README which should contain a narrative description of the project.
We are each going to make a copy of this repository to use for this workshop. To do so we will do what’s called “forking” on GitHub. A Fork is a copy of a repository that you get to experiment with without disrupting the original project.
In the upper right hand corner of the repository, click on the button that says “Fork” - see highlighted example below:
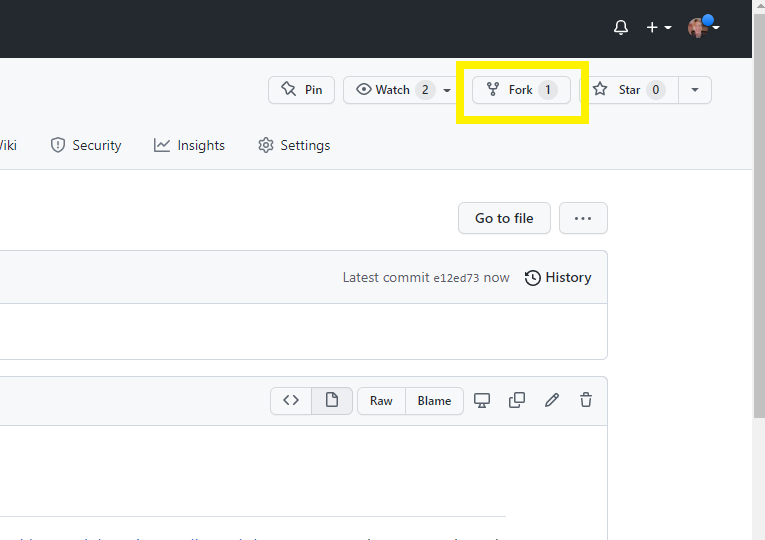
If you are a member of any organizations on GitHub, you will be asked whether you want to fork to your account or to an organization. Choose your personal account for this workshop. GitHub will process for a few moments and voila! You have a copy of the workshop repository.
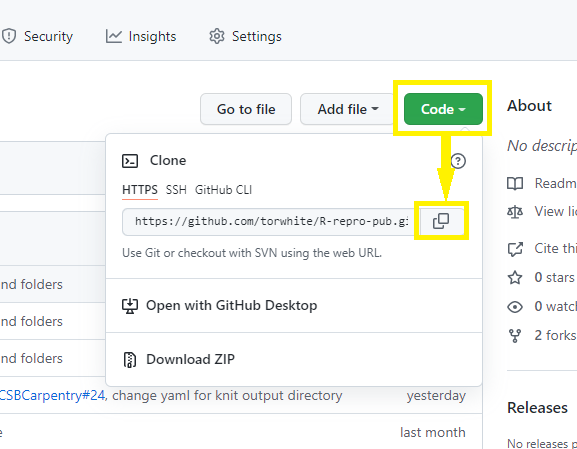
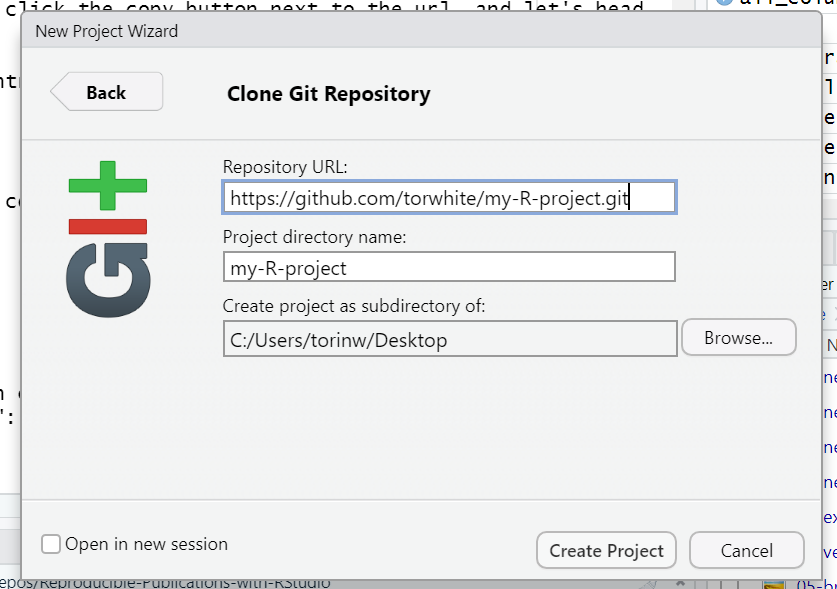
Now, click on the green Code drop-down and then click on the copy icon next to the repository url:
Now, let’s return to RStudio:
Click File>New Project > Verison Control > Git.
Ok, so if you are using Git for the first time in RStudio at this point you may be getting a notification that Git isn’t set up to work with RStudio.
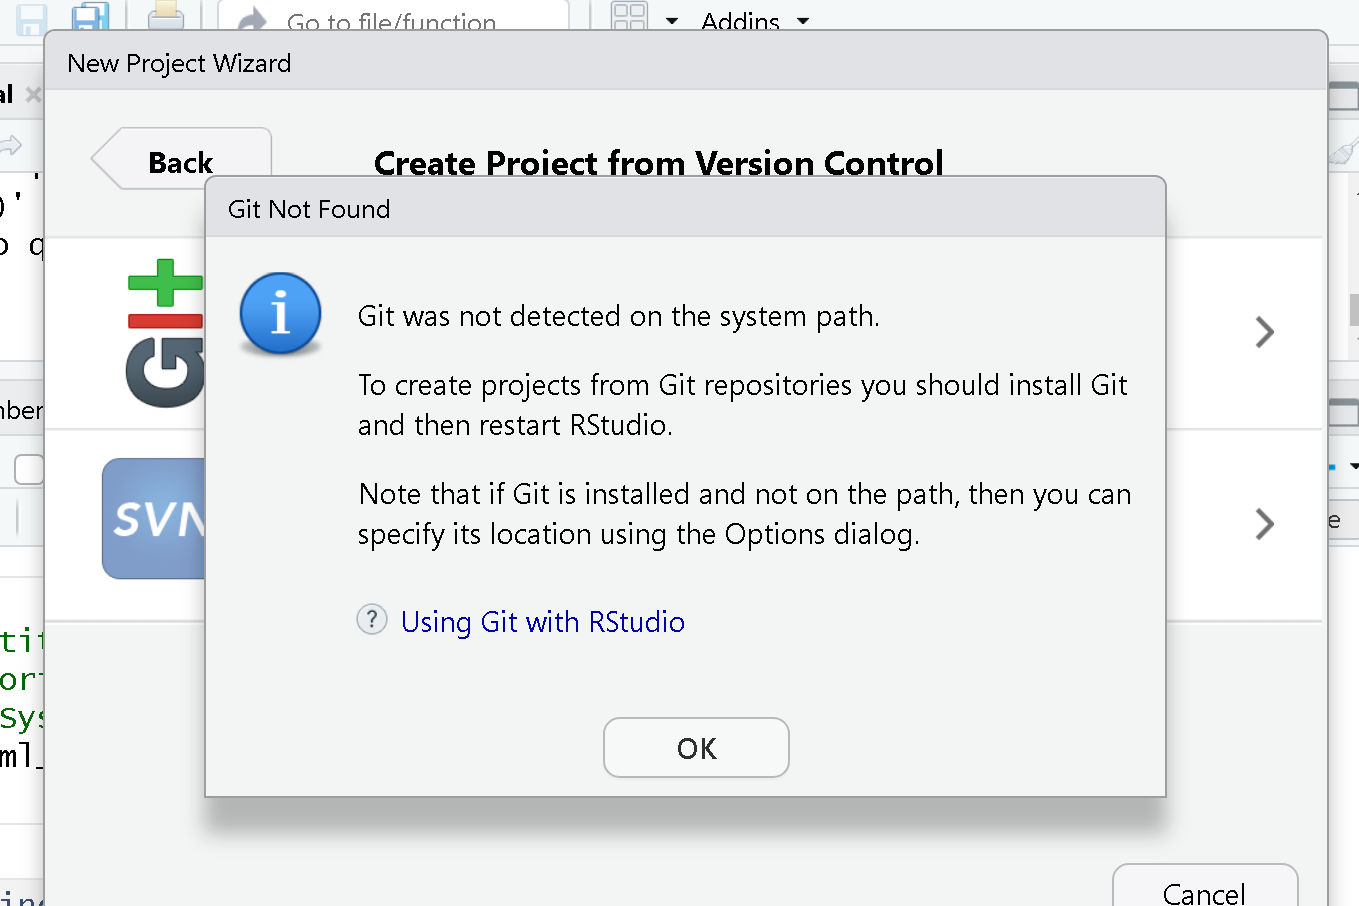
To set it up we need to go to Tools > Global Options
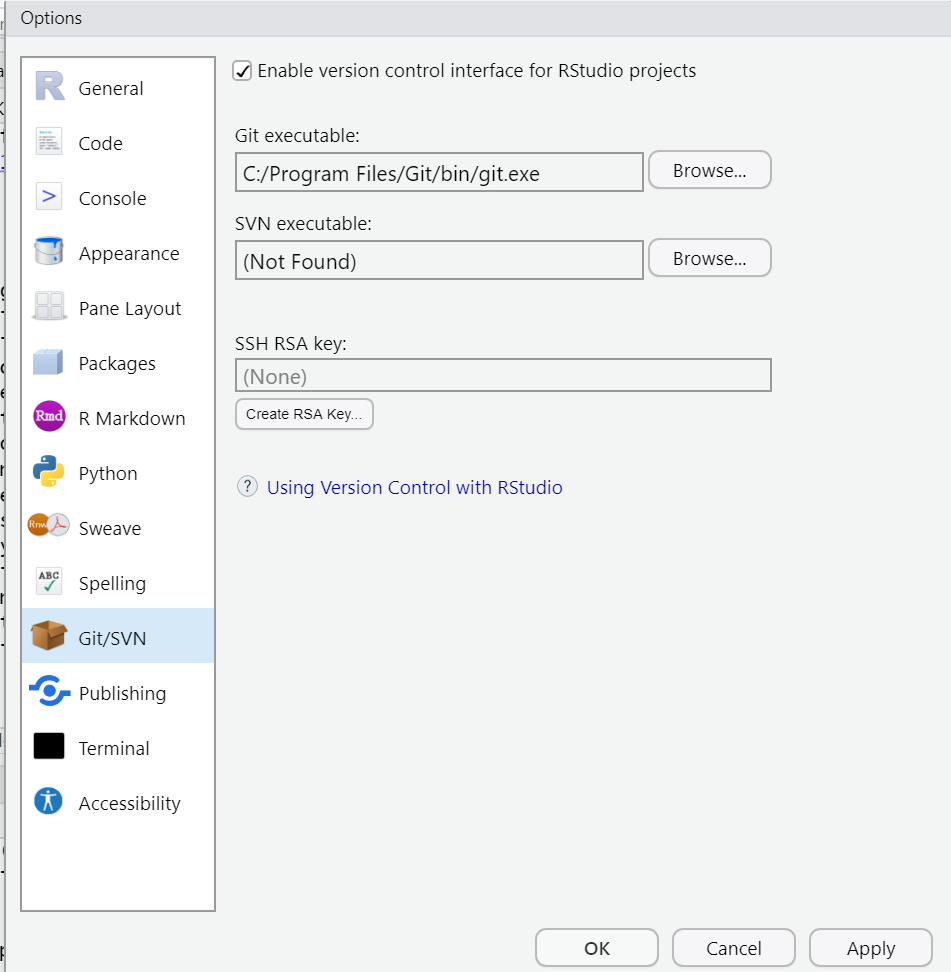
First, make sure “Enable version control interface for RStudio projects” is checkd. Next, you must make sure that the Git executable path is correct.
For macs, more than likely the path will have automatically populated. In all likelihood that path is /usr/bin/git. Windows users may find that the correct path is also pre-populated, but it is likely that you may need to manually add it by clicking “browse”. More than likely your path will be something like C:/Program Files/Git/bin/git.exe. If not, search for where Git for Windows was installed (Git) go into the bin folder and select the ‘git.exe` file.
Ok! Now that we set that up (by the way, this is a one time set up -it will work now for all future projects in RStudio on your device), we should be able to open our project from GitHub in RStudio.
So back to the url you copied from GitHub. Navigate again to File > New Project > Version Control > Git. Paste in your url and choose “Desktop” as your directory.
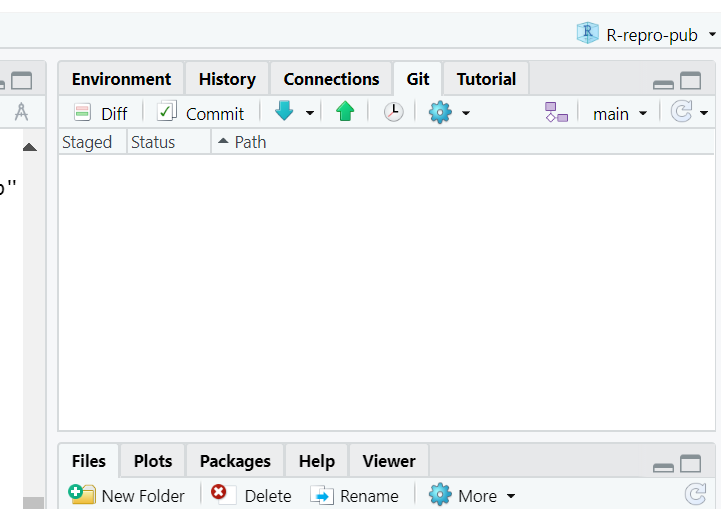
Woo hoo! We have the project we’re working on for this workshop opened in RStudio and set to use version control!
Now, let’s dive in to how to use version control.
Using Version Control in RStudio
There are two places we can interact with Git in the RStudio interface.
- Menu bar

- Environment/History pane
Ok, but what do all the options mean? We won’t go through them all, but here are the basics to get started versioning your project.
Git Workflow
The most simple workflow for version control (working on your computer only) is referred to as “add” and “commit”:
But what do those words even mean?
add: choose a file or files to take a “snapshot” of. Aka what files do you want to add to your next version?
Commit: Taking a “snapshot” of a selected version of your project. The snapshot will only include the files you “added”, typically only files that you’ve edited since your last commit.
You may have a few to many commits in a single work session.
When you commit, you add a “commit message” aka a short line of text (recommended 50 characters or less) that describes the changes that were made to the file(s) you added. This helps keep your versions organized and makes it easier to go back to remember what you did or to restore your work to exactly the version needed if you make a mistake or want to implement a change.

Git Workflow with GitHub
If we are saving our work to a version control hosting cloud platform such as GitHub, our workflow gets a bit more complex, we add a “pull” and “push” step at the beginning and end of a work session.
Pull > add > commit > push
Pull: download the most recent version of the repository from GitHub to your local computer.
Push: upload the most recent version of the repository to GitHub from your local computer.
Put a pin in pulling and pushing for now. For the time being as we edit our paper we will just stick to adding and commiting. At the end we’ll see how to use push to GitHub, and you can experiment with pulling later on.
Tips for working with Git
- You should pull each time you start working on your project after a hiatus, or before each edit if you know a team member is working at the same time.
- Commit frequently, each commit should be a distinct set of edits which you can summarize in 50 characters or less. Don’t add a bunch of unrelated edits to the same commit, it makes it harder to look back through your “snapshots” and find the right one if you need to.
- At the end of your work session (or more frequently if you are working at the same time as team members), “push” your commits to the remote repository - this is the only way your local changes get added to your team’s remote repository.
This pull, add, commit, push routine will become second nature. Pulling at the beginning and pushing at the end of your work session becomes a sort of ritual that marks the beginning and end of your work session.
Tip: add files that don’t need to be tracked to the .gitignore
Such as data files, outputs, references (you want to save those, but you aren’t actively making changes to them so we don’t need to “track” them through version control. Mostly scripts and rmd files need tracking
Discussion: (optional) Using .gitignore files
a
.gitignorefile is used to signal to Git to NOT keep track of versions of the files included in the folder. Once instance where this is used in a data analysis project is with data files.Now, there are some caveats to this, so in what situations would it make sense to add data to the .gitignore and what situations would it not?
Solution:
Why and when would it be a good idea to add data files to the
.gitignore?
- With raw data files - since they will not be modified (remember: raw data = read only).
- With sensitive data - This should absolutely not be pushed to GitHub
Why and when would it not make sense to add data files to the
.gitignoreso they will be available in the Git repository.
- pre-processed data files - these are the data files that are edited - processed from the raw data
- small data files - may not make much of a difference whether they are tracked or not
- the first time you add data files - You can’t push data files to GitHub unless
Challenge: (optional) Add the files/directories to .gitignore
Add the data (all of the raw data files) to the
.gitignore.
Hint: there are two ways to do this.
Hint2: add a forward slash/after directories.Solution:
1) open the .gitignore file by double-clicking on it in the file view pane, on a new line add
data/. Save the file and don’t forget to commit it.2) Click on the settings gear in the Git tab of the environment pane. Click on
gitignore. On a new line adddataand click save. Don’t forget to commit the.gitignorefile.

Your first edit
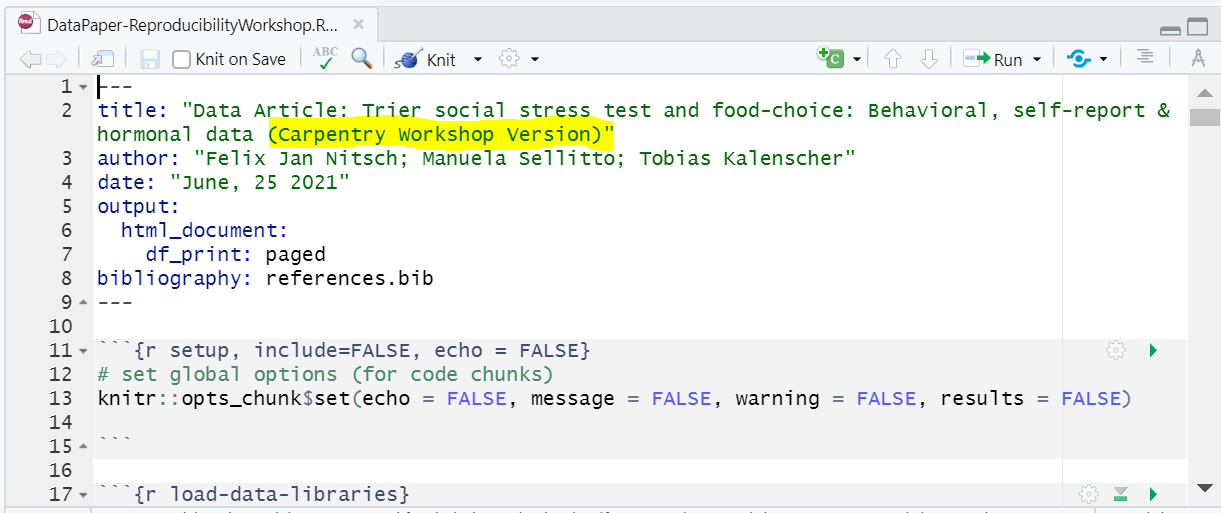
Now, let’s open up the report in this repository that’s already been drafted. The R Markdown document for the report is located in report/source. It is called: DataPaper-ReproducibilityWorkshop.rmd The first edit we will make is to the yaml file of this draft report so we can practice using version control.
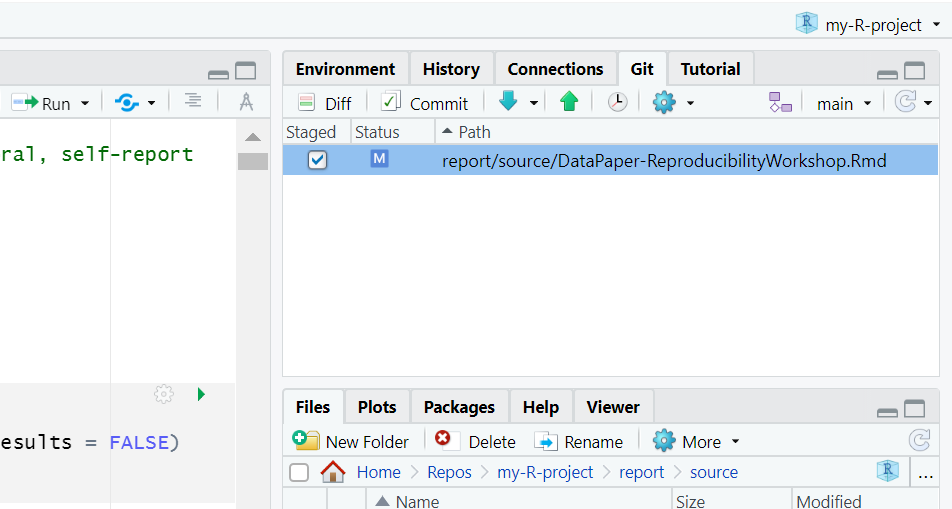
In the title add “(Carpentry Workshop Version)” and make sure to save.
Now, in the Environment panel, toggle to the Git tab. You’ll see the file that was edited with a check mark next to it. Click the check mark to “add” . Note that if you edited more than one file you could choose any or all of the documents to “add”.
Now, click commit. A dialogue box will pop up. You’ll need to add a commit message to proceed. Add something about editing the title. The difference between your files will show in the bottom panel.
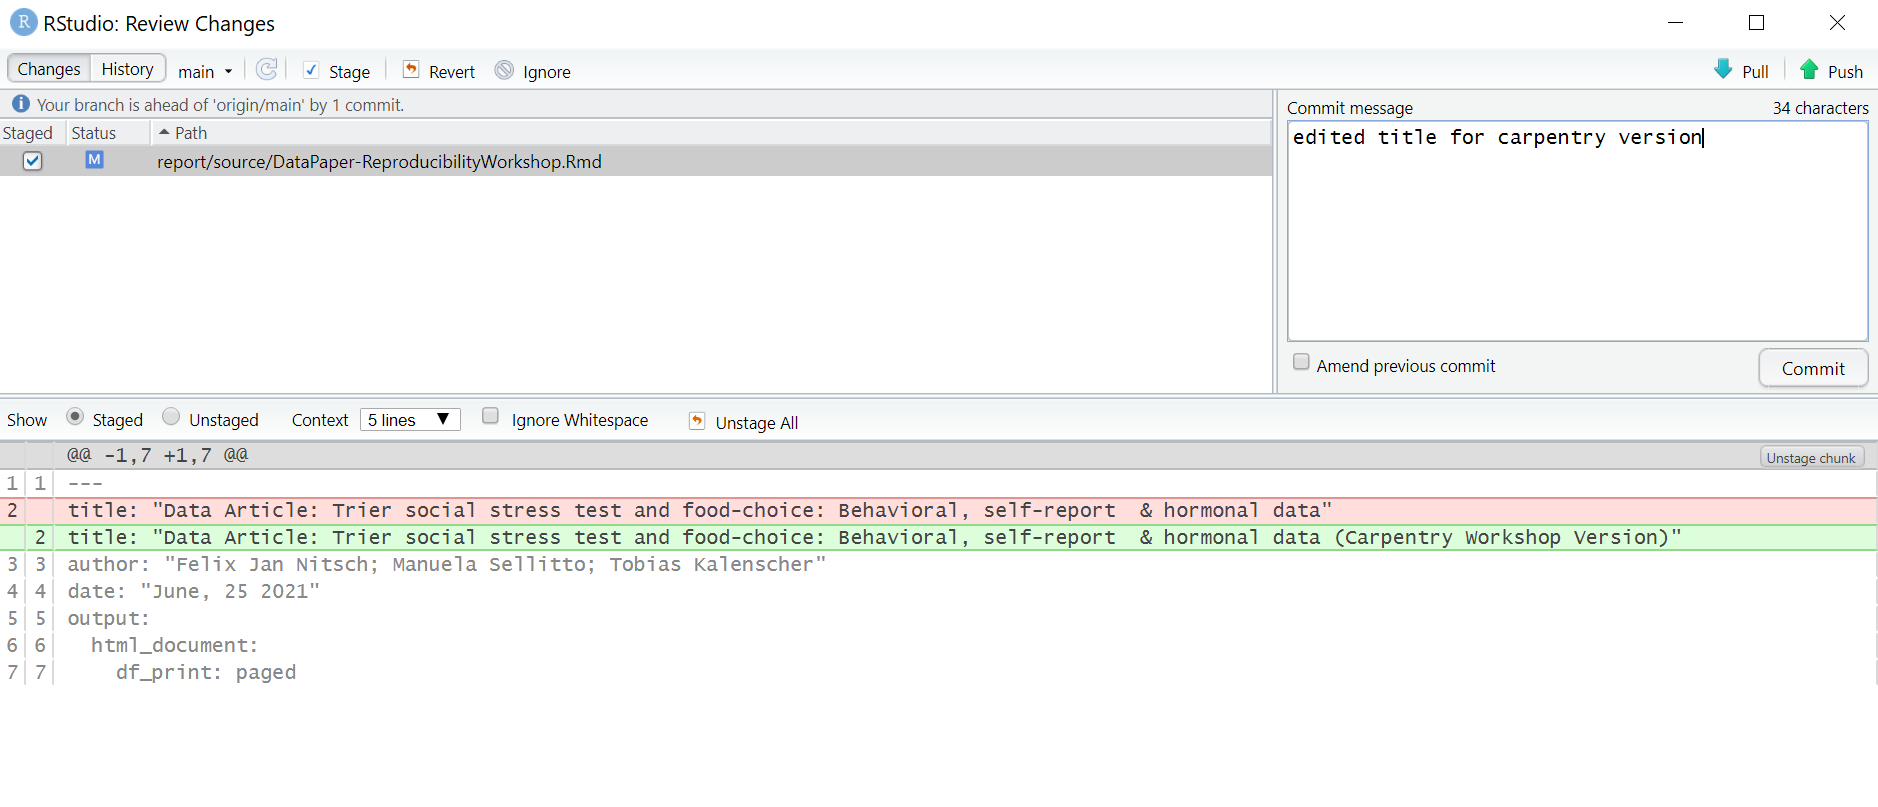
Hit commit and a dialogue box will show a completed commit.
You made your first commit!
Key Points
R Studio has Git version control functionality built in.
Forking a Github repository makes a copy of the repository into your personal account on Github.
You can clone a git repository from Github to your local disk using R Studio.
For this workshop each learner will work with their own fork of the “R-Repro-pub” repository.